


You know Kubernetes, Docker, Containerization. Want to reduce the multi-cluster management, enable organizations to accelerate container adoption?
Portainer here comes into the picture.
What Portainer does
In simple words, portainer simplifies the workload of managing all the containers in your own local environment. In daily life, developers have so many containers to deploy, and managing them becomes quite difficult, no one knows maybe you have trash volumes or images or containers, so it will eat up your space, right? that's one point. And portainer will be so handy, if any developer reading this, s/he knows how time-saving it is, like you can customize your containers, which one you want to stop, restart, redeploy, etc.
So many things are there, I will cover them one by one.
Installation (Let's begin)
So, open up your favorite (windows)CLI. For Linux and Ubuntu, commands are like-wise same, some sort of changes are there check out the Portainer documentation.
Remember, after getting started with Portainer installation, start the docker desktop. Check the version if needed to be confirmed.
First comes the Deployment:
- Create the volume that Portainer Server will use to store its database.
docker volume create portainer_data
- Then, download and install the Portainer Server container:
docker run -d -p 8000:8000 -p 9443:9443 --name portainer --restart always -v \\.\pipe\docker_engine:\\.\pipe\docker_engine -v portainer_data:C:\data portainer/portainer-ce:2.9.3
Alternative of port 9443 is port 9000 open for legacy reasons, add the following to your docker run command:
-p 9000:9000
- Now that the installation is complete, you can log into your Portainer Server instance by opening a web browser and going to:
https://localhost:9443
Alternative of Portainer installation through Docker:
This installation is as per portainer documentation. If you face any difficulty with the commands, try to follow the steps where Docker helps you to install Portainer as an extension.
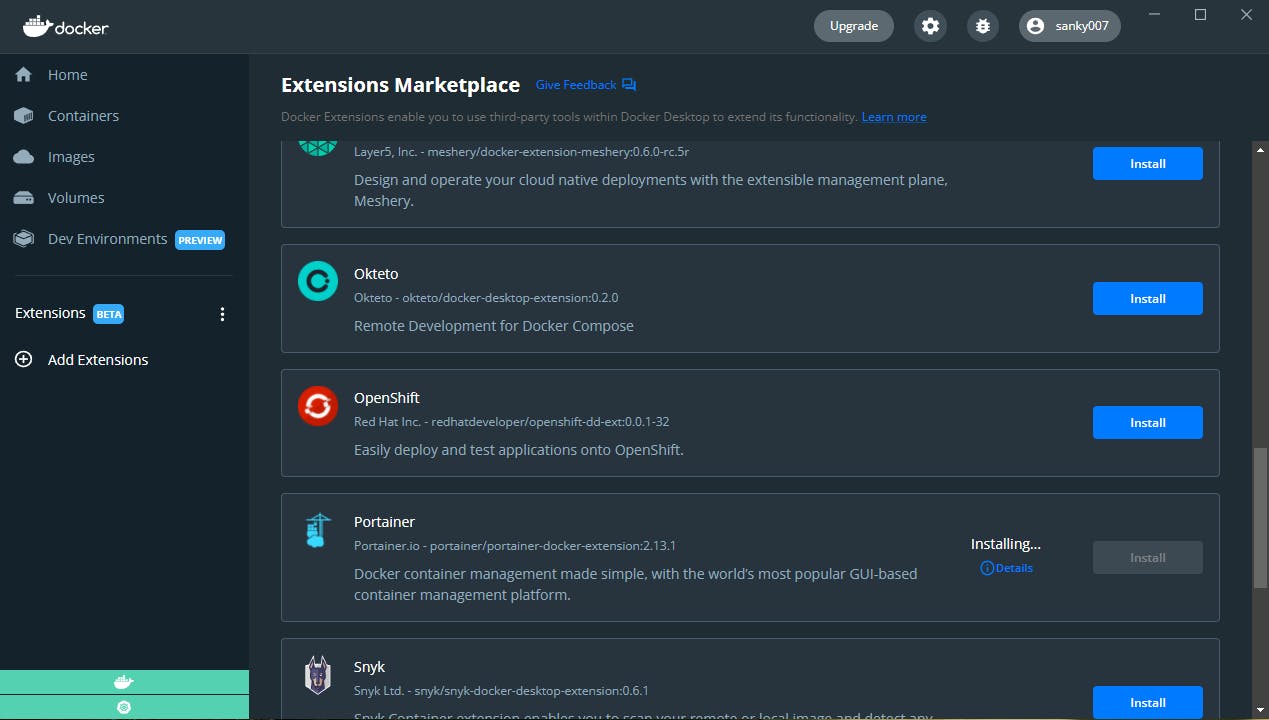
Installing Portainer extension
Open your Docker Desktop, and go to the extension tab on your left side of the menu bar. Scroll down and you will see the portainer icon. Install it!
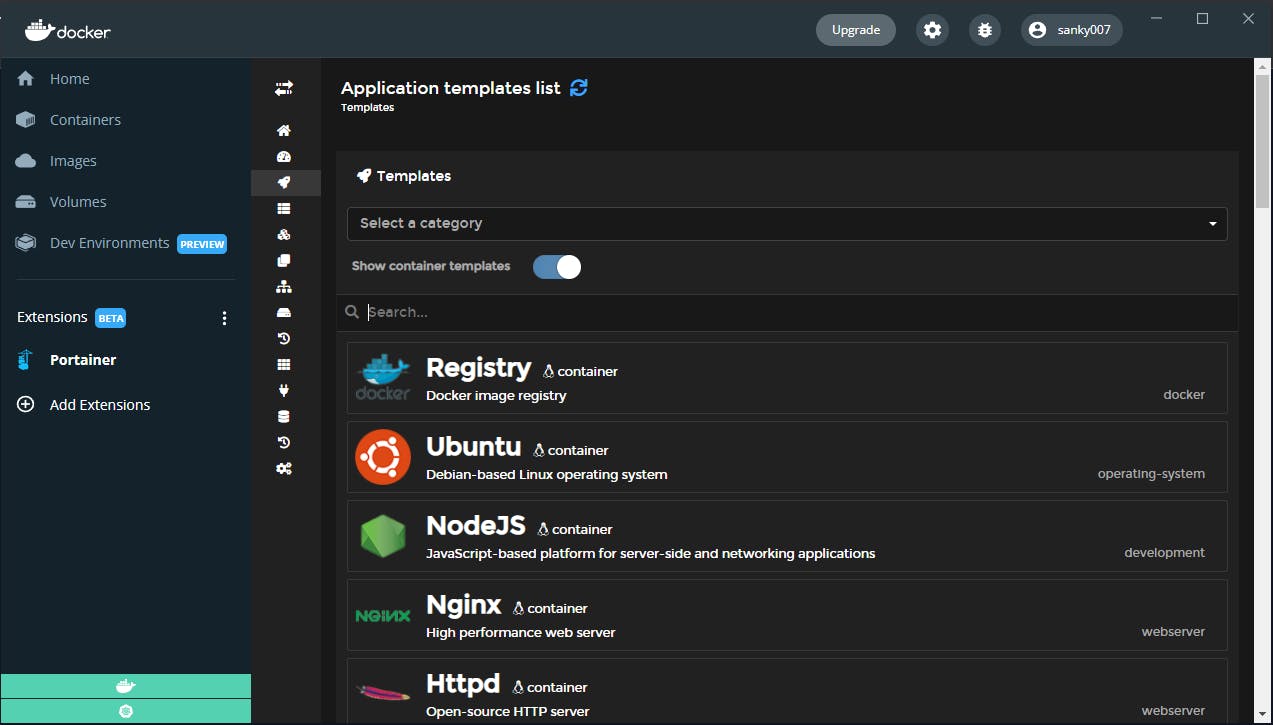
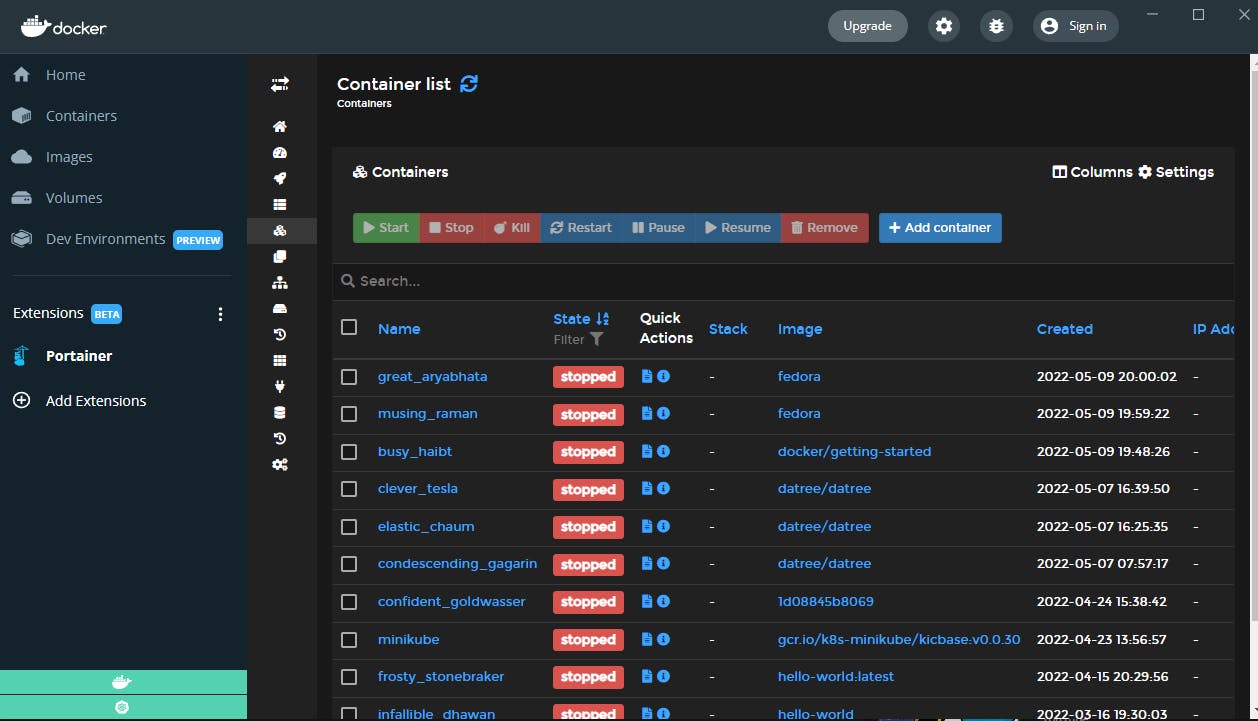
- After installation, the interface will be like this.

You will see one container is already running because Portainer always accessing everything inside the container even if this was not deployed via Portainer itself. After enter after entering the local dashboard you will see the no of Slacks, Images, Container, Volumes, Network. ring the local dashboard you will see the no of Slacks, Images, Container, Volumes, Network. After entering the local dashboard you will see the no of Slacks, Images, Container, Volumes, Network.
About Templates
If you want to deploy a container or you want to quickly deploy a database server or web server or any app, you can use those app templates easily. You can do custom templates filling up all details of templet and also add some docker composed files.
App Templates can help you to quickly deploy applications with pre-defined volumes, environment settings, and so on. For example, you can simply deploy databases, webservers, or well-known applications.
What are Stacks
It's one of the coolest features that allows you to start and run your container(s) using a well-structured docker-compose.yaml file.
So, what's the use case?
Suppose, you have a nice UI that will give you all the tools needed including a web editor that will check if the YML file is formatted and structured correctly. Meaning you will be able to have a color-coded docker-compose file ready to be executed and changed on the fly if you have the need to do it. Think how time-saving and featured full it is. So you will see there are 4 methods to deploy the stack.
Web editor, Upload from your computer, Use a git repository, Use a custom templete.
Initially, you will see zero stacks. And I'm gonna use a sample stack to deploy NGINX proxy manager
- Sample stack: "Remember to change the version, which is 2"
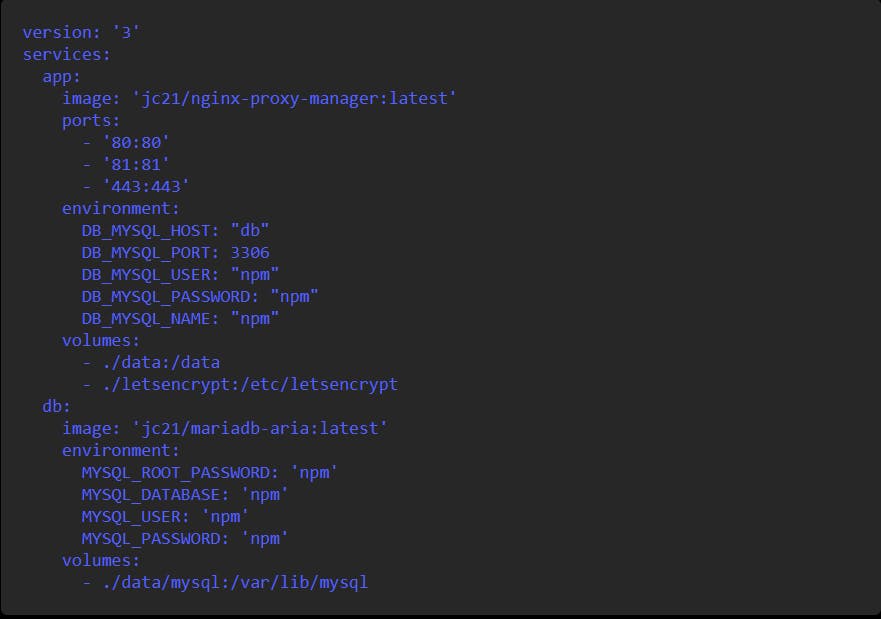
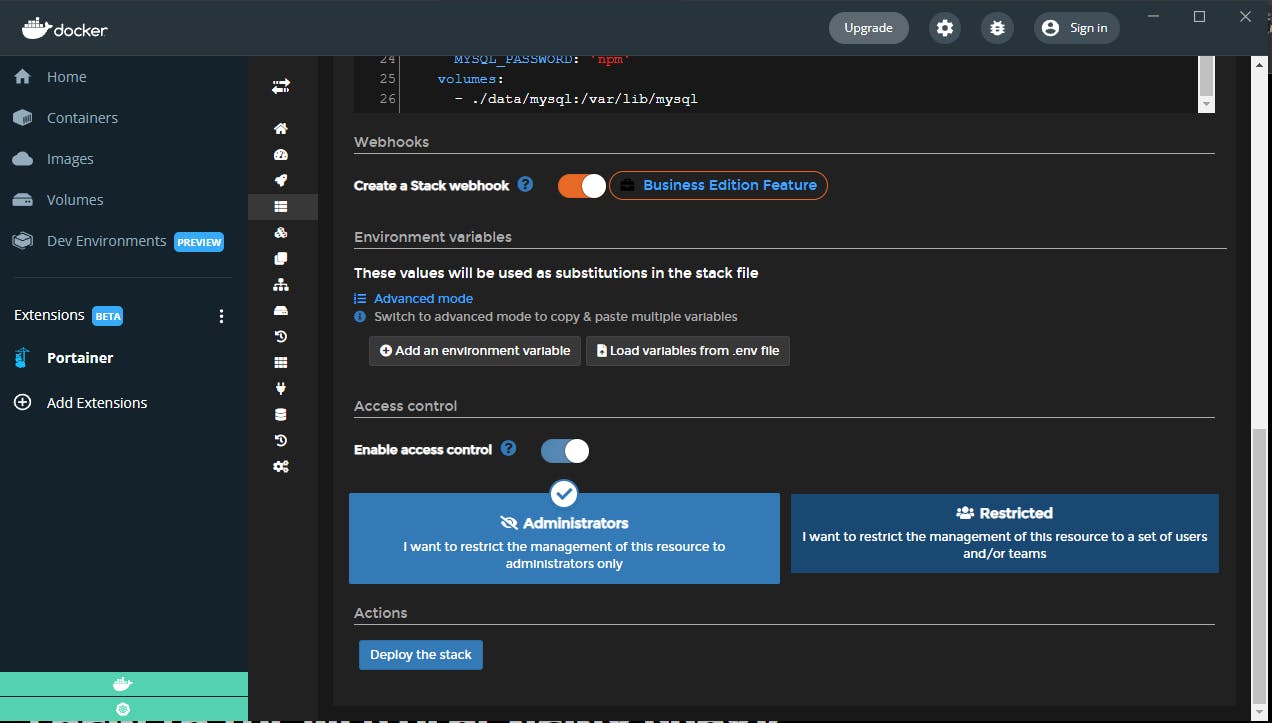
Adding docker-compose file to deploy the stack
Now go to the stack section and select "add stack "
- After that name the stack. - I will name it as "nginixproxymanager".
- Now I copy paste the docker-compose file into the web editor.
- Now click on the deploy the stack, and it will automatically create and deploy those two containers.
You can basically do the same thing in a YAML file or in a cli of docker-compose, then it will be like you are not using portainer efficiently.
Deploy a reverse proxy to expose the portainer securely
After deploying the stack, you will see two containers running in your stack list. 1st container should be application and the one should be database. Now you will see in the published ports, that there is an 81 port which is the web UI of the nginx proxy manager, when you click on that port it will show a dead web address. So, you can basically change it from the "Endpoint" section which is on your left side menu bar. Go and just edit to the local endpoint and put your domain IP address and update the endpoint.
Now when you go to that port 81, it will take you to the public IP address of the Nginx. Now just log in with your username and password.
Adding a new proxy host
Now after log in, select the "Add proxy host" and enter the Domain name, forward the host name, forward the port, and do all the credentials. Like this.
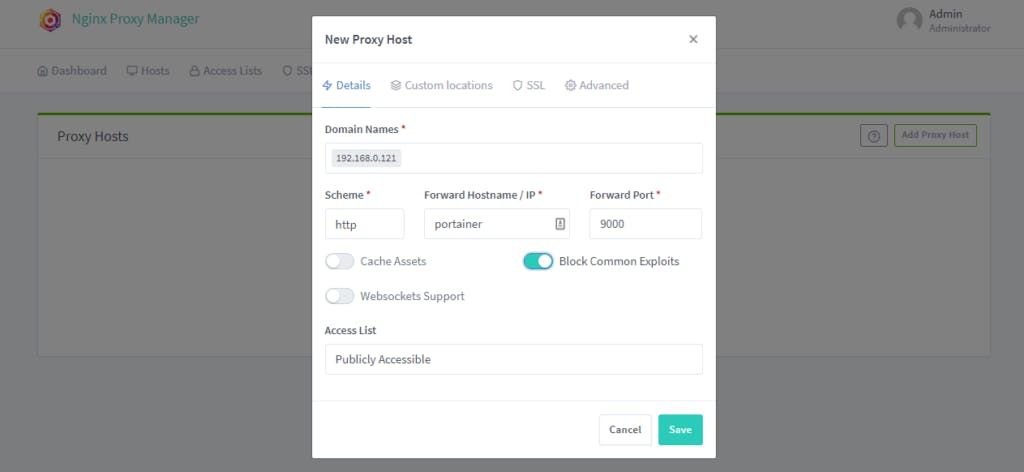
Here comes the twist, After setting up the proxy host, when you click the link, you will get a 502 bad gateway.
Now this happened because we have deployed the Nginx proxy manager in the docker-compose stack that will automatically create a new network and attach proxy manager to an isolated docker network and the portainer is running in a separate docker server So we need all docker containers that we want to expose to be the reverse proxy and are running in the same docker network. So we need to redeploy the portainer container.
You need to also close down the port 9000 because people can still access the portainer container. So go to the cli and stop the portainer container and remove the portainer container.
docker stop portainer
This will stop the portainer container
docker rm portainer
This will remove the portainer container
Docker users just uninstall the portainer extension
Now to redeploy, copy-paste the same command which you did for the CLI. But now no need to expose the 9000 directly to the public internet anymore because we want to redeploy the container using the reverse proxy and instead of 9000 add a network and put this portainer container in the same network as the Nginx proxy manager. And for Docker users just reinstall the portainer.
Now go to the Nginx web and click the link. Just login and you will see all the containers are running normally.
Ok, if you did it so far, you are awesome!
For now, it's more than enough to start with portainer. But keep exploring things about it because updates and time waits for none!
Conclusion
So here I conclude my blog, Portainer is a great tool. Use it! Thanks for reading my blog and spending your valuable time. If you like it make sure to like this blog and comment down, that supports a lot. I will update this blog whenever changes may need. Gig thanks to Saiyam Pathak and @kunalk for teaching such great content.✨
And the thanks to the wonderful community - Community classroom. 🤍