Before,
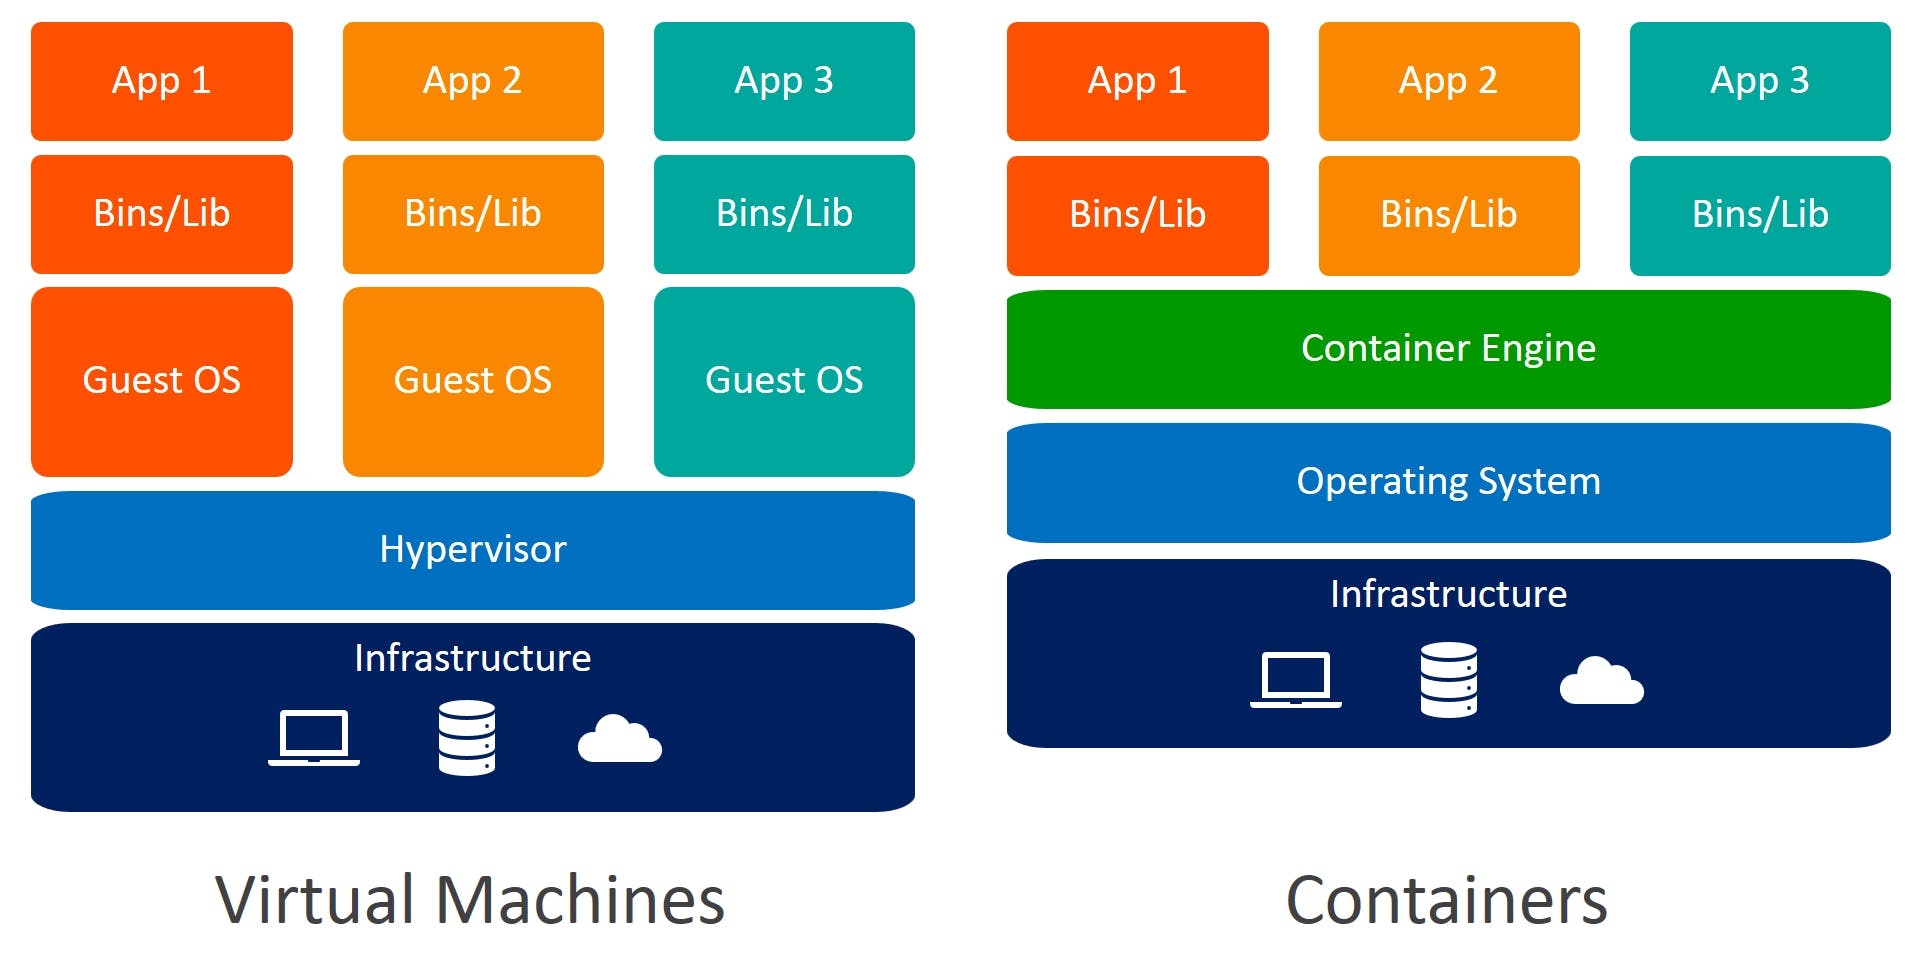
We go into the Kubernetes cluster and explore things, let's go back to the early days and see how they bound various versions of applications, patches, major and minor updates. Actually, there was no way to define resource boundaries for applications in a physical server, and this caused resource allocation issues. The main purpose of these applications were Enterprise software, meant to be used by a single organization. They were deployed and maintained internally, and on-premises.
Why Kubernetes?
As we see that there is no boundary or any maintenance of physical hardware. Cloud computing takes care of that, those organizations promise high availability and reliability of their infrastructure, and charge their customers on the basis of how many resources they used, and for how long. (Amazon Web Services (AWS), Microsoft Azure, Google Cloud, and Civo Cloud).
So Google Cloud invented the Kubernetes, which is an open source system for automating deployment, scaling, and management of containerized applications. Kubernetes is designed to effectively solve many of the issues mentioned below.
Kubernetes can run containerized applications of any scale without any downtime.
Kubernetes can self-heal containerized applications, making them resilient to unexpected failures.
Kubernetes can auto-scale containerized applications as per the workload, and ensure optimal utilization of cloud resources.
Kubernetes greatly simplifies the process of deployment operations. With Kubernetes, however, complex an operation is, it could be performed reliably by executing a couple of commands, at most.
Now Kubernetes need a cluster in which a set of nodes run containerized applications. It basically has 6 main components-
API server, Scheduler, Controller Manager, Kubelet, Kube-proxy, Etcd.
Can we set up a local cluster in our system?
For this, the answer is Yes, and it could be done with help of minikube. Now, what is minikube? -Minikube is a tool that makes it easy to run Kubernetes locally. You have to install the package of the cluster and have very limited resources. Minikube is an all in system that has no multiple architectures of master or worker nodes required. It is basically used for testing or beginner-level learning purposes. Before we dive into Minikube, there are some prerequisites we should probably set up.
1st one of them is Kubectl- It allows you to run commands against Kubernetes clusters. You can use kubectl to deploy applications, inspect and manage cluster resources, and view logs. Install kubectl on Windows:
Download the latest release v1.23.0.
curl -LO "https://dl.k8s.io/release/v1.23.0/bin/windows/amd64/kubectl.exe"
2nd follow the instructions below that for validating purpose, Append or prepend the kubectl binary folder to your PATH environment variable.
curl -LO "https://dl.k8s.io/v1.23.0/bin/windows/amd64/kubectl.exe.sha256"
Install Minikube
Now in the download section, first you need to select the Operating system, Architecture, Release type, Installer type. Then click on the link to download minikube to your system.
After download just normally install that in your local disk.
Now the next step is to start minikube. For that write the command
minikube start
Now let's try to verify this. If it is running, you can use the command kubectl get pods to verify it.
you want to see the verification and look at the status of the cluster. In that case, you can use the command minikube status and you will see Kube configured, API server kubelet, host, and type control plane, and everything listed over.
If you type minikube dashboard you will be automatically redirected to a particular URL that you can see on the screen.
Explore some Docker commands
minikube docker-env : Basically they just output the environment variables that are required for a local docker client to communicate with remote server of docker.
docker container ls: This will show the list of running containers that is on the virtual machine.(System container).
minikube ssh
docker container ls: This will do the same just entered into the minikube and list out all the running containers.
kubectl config current-context: Kubectl is configured to the Kubernetes inside the newly created cluster.
kubectl nodes: This will show you the names of the clusters, status, roles, age, and versions.
kubectl get -all --all namespaces: This will show you all the components that are running over the cluster.
minikube stop: This will stop your Kubernetes cluster. It will shut down the virtual machine but it's gonna preserve all the cluster status and data.
minikube delete: This will delete the minikube cluster, like all the status and data.
Civo Platform
- Basics
As you saw before, minikube limits us both in terms of resources and testing out all the features that Kubernetes can provide. To solve that problem, we will now be using the Civo platform to try out Kubernetes, install the Kubernetes cluster using a Civo account, and try out all the various features that Civo offers. Also, we will look at the marketplace and other apps that you can install, and so on. As you can see, by using Civo, you can start a Kubernetes cluster in just a matter of seconds. It's speedy, and it has simplified billing. If you sign up, you can get $250 of free credit.
- Civo Features
Civo offers several features, including incredible launch times, making it fast to spin up a Kubernetes cluster in just under 90 seconds. It also provides flexible automation tools for your CLIs or your APIs. Also, it is developer-focused, and for that, we have many apps in our marketplace, which we'll be seeing in this particular video. We also offer high availability as a standard, multi-region support, and simple node management. To get started, you have to log in to your Civo account.
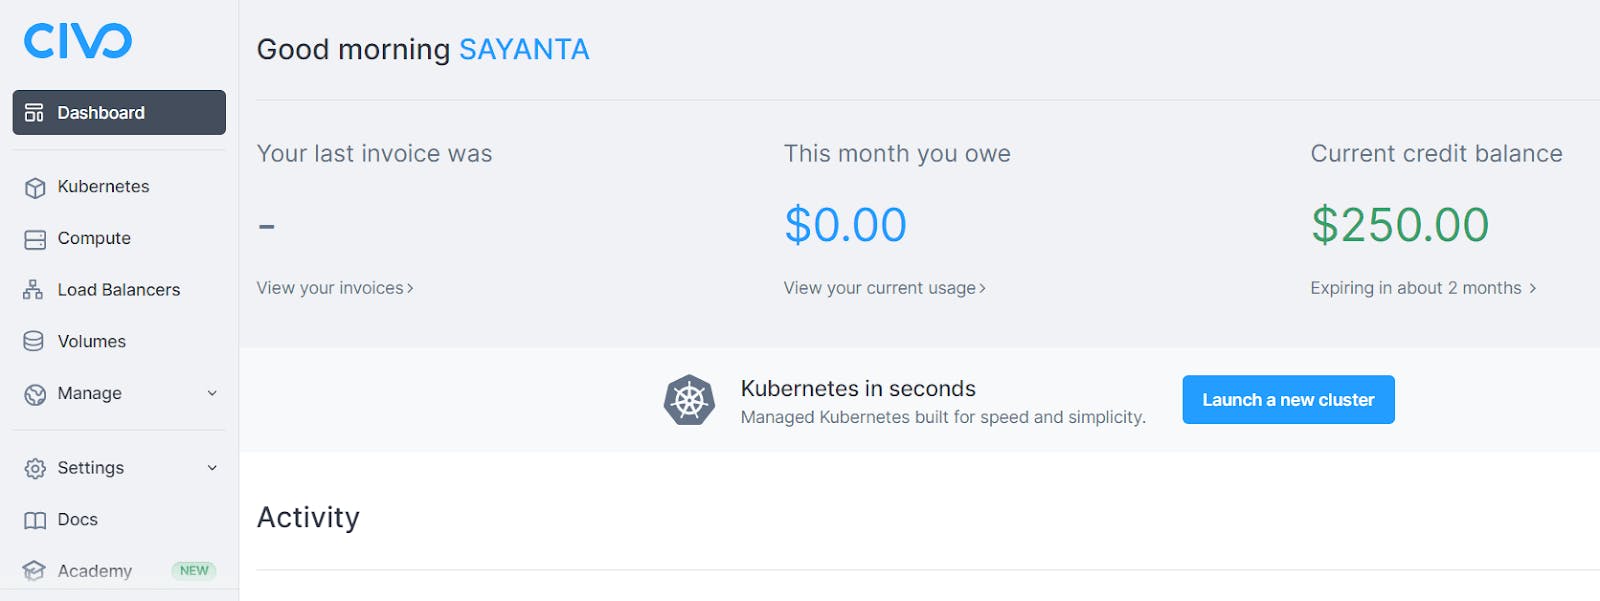
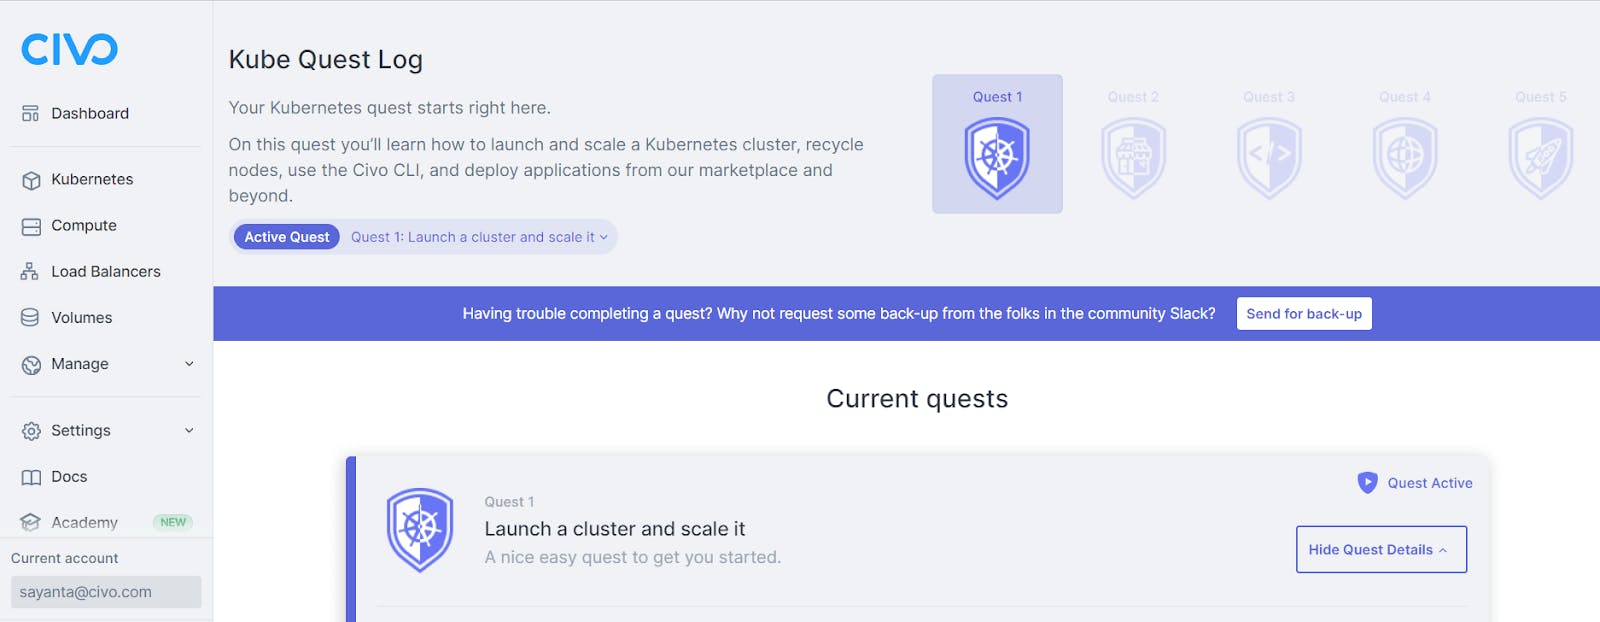
- After logging in, you will see a Civo dashboard and can use this particular dashboard to create your Kubernetes cluster and manage all the specific resources all at once. The UI is simple. You can use this to complete the quests and learn more about Kubernetes on Civo. You can also learn how to install various marketplace apps and all the other features that Civo offers.
- Civo Marketplace
Next, you will see the previously discussed Civo marketplace. For example, if you want to include some databases, you can select Kafka, Redis, etc. If I want to set up monitoring, I can set up a Prometheus operator. For CI/CD, I can set up ArgoCD. I can also go into management, architecture, and security. You can set up Falco, OPA, and so on in the security section.
Resources and Conclusion
You can follow Kubesimplify.com an Initiative by Saiyam Pathak for encouraging beginners to get into the cloud world.
You can follow Kunal Kushwaha on Twitter and also his amazing DevOps Boot Camp Youtube Channel
- And also visit Civo to get hands-on practice

